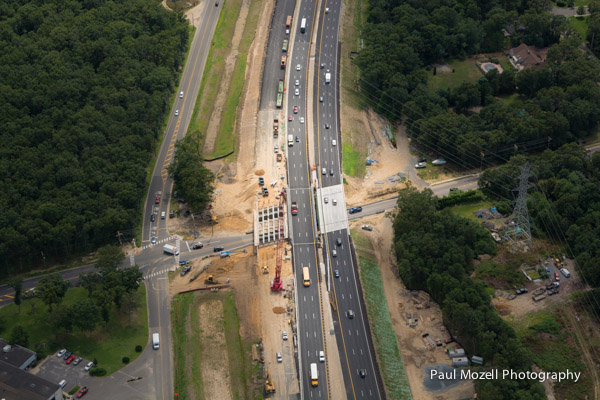
Yesterday I had the pleasure of flying over Toms River, New Jersey, where I had been retained to photograph a bridge on the Garden State Parkway. My client builds temporary bridges to support emergency or planned construction of highway sections. Recently, I’ve photographed bridges on Martha’s Vineyard, the Merrimack River, and The Connecticut River. After shooting the bridge from the ground, I went to a local airport where I had arranged a private flight with an instructor and a Cessna 172, single-engine, top-wing airplane. I was impressed that my pilot Tom asked if I wanted the left or the right seat. He observed that since most people have a preference to turn one way or the other, that photographers he’s flown with have a preference for left or right. No planes were queued up at 2 PM so we headed straight for the runway and took off. We flew east over some of New Jersey’s vast Pine Barrens, and in the distance saw Lakehurst, NJ, the town made famous by the Hindenberg disaster. Atlantic City was visible about 30 miles away to the south. The Toms River section of the Garden State Parkway has multiple construction sites and from 1500 feet they all look similar. Had I not visited my client’s job site earlier in the day, finding the right spot would have been challenging. Finally I spotted the right cluster of trucks and heavy equipment. Tom dropped the airspeed down to about 125 and I opened up the top-hinged window on my left. Before the flight Tom removed a small restraining arm from the window so that it would open far enough to give full clearance for my camera. I ensured that I had a good grip on the Nikon D7100 and its strap before I pointed the wide-angle zoom toward the ground. As the pilot banked the plane to the left, making small right circles around the site below, I was perfectly positioned to get the shots I needed. I took care not to stick the lens beyond the edge of the window frame where the strong winds would buffet the camera and blur the shots. Based on prior experience I set my shutter speeds between 500th and 1200th of a second. I took care not to rest my elbows or any part of my arms on the plane’s door—which would transmit the intense vibration of the plane into the camera. I punched off a 100 or so frames with an 18-50mm lens, bracketing shutter speeds throughout. I was confident that the even light of mid-day would not pose a challenge for the camera’s advanced metering system. After a few loops around “the target” with the short lens I switched to a 70-300. I’d considered taking a 70-200 but in the end opted for the lens with the shorter overall length. In hindsight, the heavier lens might have been easier to hold steady. Real aerial photographers sometimes use gyroscopic-balanced systems for stabilizing the camera. I had to…
Continue reading